The Complete Guide to Running Form for Brand New Runners
Quick Answer: For a brand new runner, three things account for almost all of the benefit: run tall with a slight forward lean from the ankles, land with your foot close to under your hips rather than reaching out in front, and take shorter, quicker steps. Everything else - arm carriage, hip stability, breathing rhythm - follows from those and gets easier once they are in place. Do not try to change all three in one run.
Running form advice is one of the noisiest corners of the internet, largely because most of it is written for people who already run well and want the last two percent. If you have been running for six weeks, the useful version is much shorter and much more forgiving. Here it is, in the order that actually pays off.

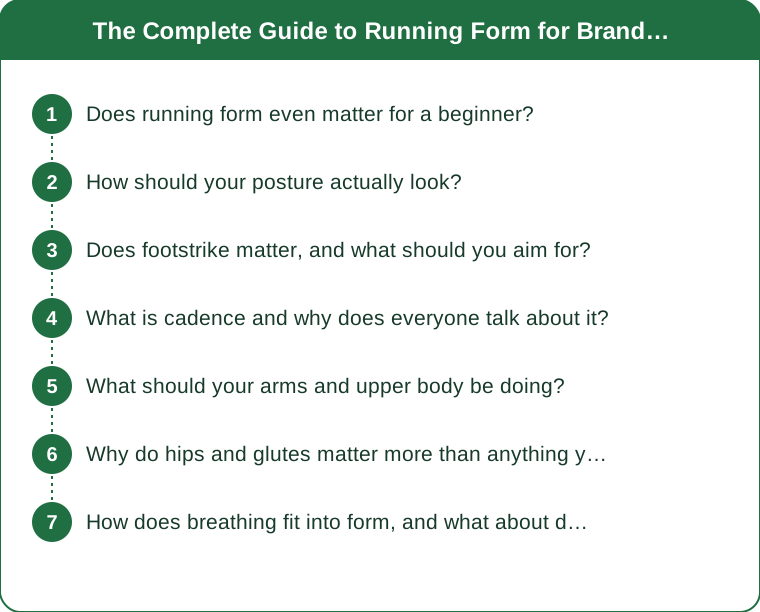
Does running form even matter for a beginner?
Yes, but not in the way most articles imply, and the reason matters for how you should approach the rest of this guide.
The research on running form is genuinely mixed. There is no single technique that is fastest or safest for everyone, and studies that have tried to identify one universally optimal form have not found it. Bodies differ in leg length, hip structure, ankle mobility, and tendon stiffness, and those differences produce different efficient patterns. A form that looks slightly odd but feels effortless is usually better than a textbook form you have to concentrate to hold.
So why bother at all? Because a small number of patterns are reliably associated with higher impact loads and higher injury rates in new runners specifically. Overstriding - landing with the foot well in front of the body with a straight leg - is the clearest one. It sends a sharp impact spike up through the shin and knee, and it acts as a brake on every single step. New runners overstride far more than experienced ones, because when you are told to run faster the intuitive response is to reach further, and because walking mechanics carry over into early running.
The second reason is efficiency. A new runner is fighting for every scrap of energy, and wasted movement - excessive vertical bounce, arms crossing the body, a heavy landing - costs energy you do not have to spare in week five.
The third reason is that early habits stick. Six weeks in, you are still writing the motor pattern. Changing it now costs a few weeks of mild awkwardness. Changing it after three years costs considerably more.
What this guide is not: a list of things you are doing wrong. If you are running without pain and finishing your sessions, you are doing the main thing right. Treat what follows as a menu, work on one item at a time, and give each one two or three weeks before you judge it.
How should your posture actually look?
Posture is first because everything downstream is shaped by it. Get the torso wrong and no amount of foot placement work will hold.
Run tall. The cue that works for most people is to imagine a line running from your ankles through your hips and shoulders to the top of your head, and to lengthen along it. Not chest puffed out, not shoulders pinned back - just the feeling you get when someone tells you to stand up straight and you stop slouching. Your ribcage stacks over your pelvis rather than sitting behind it.
Lean from the ankles, not the waist. A slight forward lean of the whole body helps gravity assist each step. The mistake is bending at the waist, which is what tired runners default to. Bending at the waist shifts your centre of mass forward without bringing your hips with it, which forces your legs to reach further to catch you - overstriding by another route. Stand upright, rise slightly onto the balls of your feet, and let yourself tip forward until you have to step. That whole-body angle is the lean.
Eyes about twenty metres ahead. Looking at your feet drops your chin, which rounds the upper back and closes the chest, which restricts breathing. Looking too far up hyperextends the neck. Twenty metres of ground ahead of you is the sweet spot, and it also means you see the pothole.
Shoulders down and loose. They creep up toward the ears as you fatigue, particularly in the last third of a run. A useful habit: every time your watch beeps a lap, or every time you pass a lamp post, drop the shoulders and shake the hands out for two steps.
Hips forward, not sitting back. New runners commonly run in a slight sitting position - hips behind the ribcage, glutes disengaged. The cue that helps is to think about squeezing the glute of the leg that is behind you at the moment it pushes off. If that feels like nothing, the hip strength section later in this guide is the one to prioritise.
Check posture at the start of a run, at the halfway point, and in the last five minutes. It is the first thing to fall apart when you get tired, and the easiest to reset once you notice.
Does footstrike matter, and what should you aim for?
This is the most argued-about topic in running and the one where beginners most often make things worse by intervening.
The short version: where your foot lands relative to your body matters much more than which part of the foot touches down first. A runner who lands heel-first with the foot close under the hips is in a good position. A runner who lands forefoot-first with the leg reaching far in front is not, and is loading the calf and Achilles heavily in the process.
Roughly 75 to 80 percent of recreational runners land heel first, and studies comparing injury rates between footstrike patterns have not produced a clear winner. Heel strikers tend to see more knee and shin loading; forefoot strikers tend to see more Achilles and calf loading. Neither is a defect.
So the thing to work on is stride length, not foot angle. The signs you are reaching too far:
- A loud slapping landing you can hear
- A distinctly straight front leg at the moment of contact
- Shin soreness that appears early in runs rather than late
- The feeling of braking slightly with every step
The fix is almost always cadence - covered in the next section - because taking quicker steps automatically shortens them and brings the landing point back underneath you. Nearly everyone who fixes cadence finds their footstrike quietly moves on its own without a single conscious thought about heels or toes.
Do not deliberately switch to forefoot striking. This is the single most common way new runners end up with an Achilles or calf injury. The calf complex takes months to adapt to that pattern, and a change made in one week produces load it is not ready for. If your form naturally drifts toward a midfoot landing as your cadence improves, that is fine. Forcing it is not.
One exception worth flagging: if you have persistent shin splints that have not responded to slower progression, better shoes, and a rest week, a small deliberate change in landing pattern is something a physio may suggest. That is a supervised change with a specific reason, not a self-prescribed overhaul. This is general information, not medical advice.

What is cadence and why does everyone talk about it?
Cadence is simply how many steps you take per minute, counting both feet. It is the single highest-leverage form variable for a new runner because it is measurable, it is easy to change, and changing it fixes several other things at once.
The numbers. Many recreational runners land somewhere between 150 and 165 steps per minute. Efficient runners are often in the 170 to 180 range. The frequently quoted 180 figure came from observing elite runners at race pace and is not a target you should chase - your optimal cadence depends on your height, leg length, and speed, and it naturally rises as you run faster.
Why raising it helps. At a given pace, more steps per minute means each step is shorter. Shorter steps mean the foot lands closer to under your hips, which means:
- Less braking force on each landing
- Lower peak impact through the knee and shin
- Less vertical bounce, so less energy spent going up instead of forward
- A shorter time in contact with the ground
How to change it. Count your current cadence first: run at an easy pace for a minute and count how many times your right foot lands, then double it. Do this on three separate runs and take the average - it varies with pace and terrain.
Then aim to raise it by about 5 percent. If you are at 158, aim for 166. Do not jump to 180. A 5 to 10 percent increase captures nearly all of the benefit with a fraction of the awkwardness, and a bigger jump usually just makes you tired and frustrated.
The practical tools: a metronome app set to your target, a playlist at the right beats per minute, or a watch that displays cadence live. Do it for two to three minutes at a time, a few times within an easy run, rather than for a whole session. It should feel slightly silly and slightly quick at first. Within two or three weeks it stops feeling like anything.
And keep the pace the same while you do it. The point is shorter steps at the same speed, not running faster. If your pace climbs, you have changed the experiment.
What should your arms and upper body be doing?
Arms are the part everyone ignores and then wonders why their shoulders ache after a 5k. They do real work: they counterbalance the rotation of your legs and hips, and when they are doing it badly, your torso twists instead.
Elbows around 90 degrees, roughly. Not measured with a protractor. A comfortable bend that stays consistent. Arms that straighten as you tire lengthen the pendulum and slow your arm swing, which drags your cadence down with it - your arms and legs are rhythmically coupled, so slow arms produce slow legs.
Swing from the shoulder, front to back. The hand should travel forward to roughly the middle of your chest and back to about your hip. If your hands are crossing the midline of your body, your torso is rotating to compensate, which wastes energy and can irritate the lower back over longer distances. A cue that helps: imagine your hands brushing past the seam on your shorts on the way back.
Hands relaxed, not clenched. A light cupped hand, as if holding something fragile. Clenched fists send tension up through the forearms into the shoulders and neck, and by the end of a run that becomes a real ache. Some people find it easier to run with their thumbs resting lightly on their index fingers as a reminder.
Shoulders low and level. Covered in the posture section, but worth repeating because it is where fatigue shows first. Every few minutes, drop them deliberately.
The upper body should be quiet. Some rotation through the torso is normal and even helpful. Visible side-to-side sway, a bobbing head, or shoulders rocking are signs that your core is not stabilising - which is usually a strength issue rather than a technique issue, and it shows up much more at the end of a run than the start.
Uphill and downhill change the rules slightly. Going up, a more pronounced arm drive genuinely helps and shorter steps are correct. Going down, resist the urge to lean back and brake - keep the lean slight and let cadence increase. Braking downhill is one of the fastest ways for a new runner to get sore quadriceps and irritated knees.
Why do hips and glutes matter more than anything you do with your feet?
Because the hip is where most of the stability in a running stride comes from, and weakness there shows up as a form problem somewhere else entirely - usually at the knee.
What good hip control looks like: when you are standing on one leg mid-stride, your pelvis stays roughly level and your knee tracks over your foot rather than collapsing inward. When the glute medius - the muscle on the outside of your hip - is not strong enough, the opposite hip drops and the standing knee falls inward. That inward collapse is strongly associated with runner’s knee and IT band pain, and no amount of cadence work fixes it because it is a strength problem, not a technique one.
How to check it in ten seconds. Stand in front of a mirror on one leg with the other foot lifted just off the floor. Slowly bend the standing knee about 30 degrees. Watch the knee and the opposite hip. If the knee drifts inward toward the midline or the free hip drops noticeably, that side needs work. Compare left and right - a difference between sides is more informative than either side alone.
The three exercises that cover most of it:
- Side-lying leg raises or clamshells - 2 sets of 15 each side, targeting the glute medius directly. Slow, no rolling backward.
- Single-leg glute bridges - 3 sets of 8 to 10 each side. Push through the heel, squeeze at the top for one second.
- Step-downs from a low step - 3 sets of 8 each side, lowering slowly and watching the knee track over the middle toes.
Two sessions a week, on non-consecutive days, ideally after an easy run or on a rest day. Ten to fifteen minutes. This is genuinely the highest-value thing a new runner can do that is not running.
Why it beats form drills for most people: you can consciously hold a good position for the two minutes you are thinking about it. You cannot consciously hold it for 30 minutes. Strength is what holds the position when your attention has moved on to how far is left.
How does breathing fit into form, and what about drills?
Breathing is not usually classed as form, but it is coupled to your stride and it is the thing most new runners find hardest in the first two months.
Breathe through the mouth. Nose-only breathing does not supply enough air at running intensity for most people. Mouth breathing, or both together, is normal and correct.
Breathe into the belly, not the upper chest. Shallow chest breathing uses a fraction of your lung capacity and drives that panicky feeling in week three. Lie on your back with a hand on your stomach and practise making that hand rise while your chest stays still - then take the same pattern into an easy walk, then into a run.
A rhythm helps some people. Three steps in, two steps out at easy pace, dropping to two-in-two-out when it gets hard. It is not compulsory. Its main value is that it gives you something to concentrate on other than how much is left, and it stops the breath-holding that some people do without noticing on hills.
Side stitches are common early on and usually respond to slowing down, breathing out forcefully on the step where the opposite foot lands, and not eating a large meal in the two hours before running.
On drills: they help, and they are also easy to overdo. Two are worth the time for a beginner.
- Marching high knees, 2 sets of 20 metres, focusing on standing tall and driving the knee up rather than leaning back. This teaches hip drive and posture together.
- Butt kicks, 2 sets of 20 metres, easy and quick rather than forceful. This encourages a faster leg turnover, which supports cadence.
Do them after your warm-up walk, before you start running. Two minutes total. Skip the elaborate drill routines you find in videos aimed at competitive runners - they are not wrong, they are just not where your first year of improvement comes from.
And the honest summary of the whole guide: posture, cadence, and hip strength. If you only ever address those three, your form will be fine, and the rest will largely sort itself out while you are busy running.
TL;DR:
- Run tall with a slight lean from the ankles, eyes twenty metres ahead, shoulders loose.
- Where the foot lands matters far more than which part touches first - do not force a forefoot strike.
- Raise cadence by 5 to 10 percent at the same pace; it fixes overstriding, braking, and bounce at once.
- Keep arms swinging front to back with relaxed hands, and stop them crossing the midline.
- Hip and glute strength, twice a week for fifteen minutes, does more than any drill.
- Breathe into the belly through the mouth; a rhythm helps but is optional.
Work on one thing at a time, give it three weeks, and judge it by how running feels rather than how it looks. The runners who improve fastest are not the ones who fixed everything - they are the ones who fixed cadence, got their hips strong, and then went running.
Keep Reading
This article is for general informational purposes only and is not medical advice. Always consult a qualified health professional for guidance specific to you.